.png?width=180&height=55&name=welbi_logo_colour%20(6).png)
Before you start
- Ensure you have Show Resources enabled in your the Community Portal settings. If this isn't enabled, residents and families will not be able to see the Resources tab within the Community Portal.
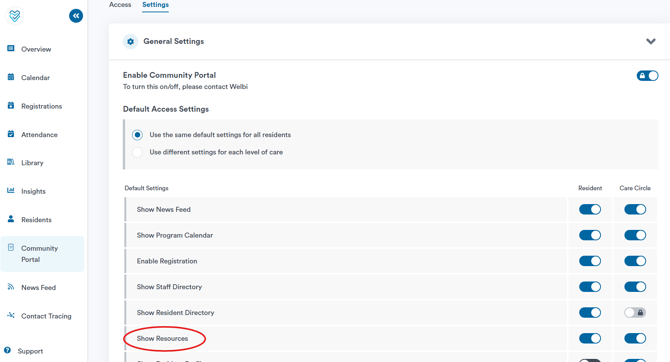
- Note that only users with the Welbi Admin user role can enable and disable default settings.
- Note that only users with the Welbi Admin user role can create and edit content in Welbi Drive.
Step 1: Open Welbi Drive
- Log in to Welbi and select Welbi Drive from the main menu on the left hand side of the screen
- Click into the Community Portal folder.
Step 2: Create a resource folder
- Click Add Folder in the bottom right corner of the screen.
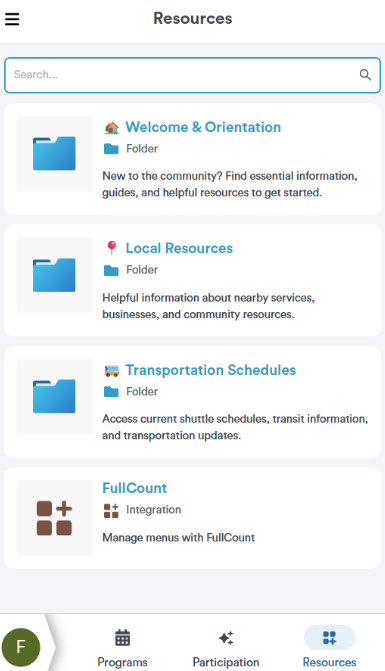
- If you want the folder to appear with a custom icon in the Community Portal, upload one in the Icon Image panel. See "FullCount" in the screenshot below for an example of how these images appear in the Community Portal.
- In the Folder Details panel:
- Enter a Folder Title (e.g., "Welcome & Orientation" in the Community Portal screenshot below)
- Enter a Description if desired (e.g., "New to the community? Find essential information, guides, and helpful resources to get started" for the Welcome & Orientation folder in the Community Portal screenshot below).
- Select the Sort Direction in Community Portal
- Select the Community Portal Visibility
- Click Create in the bottom right corner of the screen
Step 3: Upload content to folders
- Click Add File in the bottom right corner of the screen
- Select the resource type you wish to add
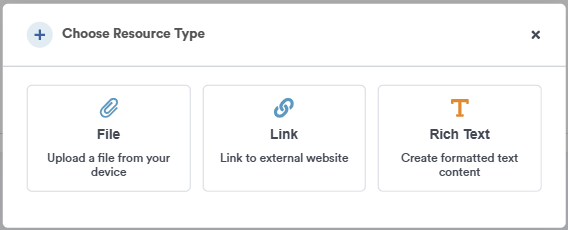
- Upload the file and/or enter the link or rich text information on the next page, then click Create. The content will be available in the Community Portal immediately.
- Repeat Steps 2-3 for any additional resources