If you're looking to add a new resident to Welbi, you can do so in the "Residents" section using the blue "Add Resident" button at the top of your resident list.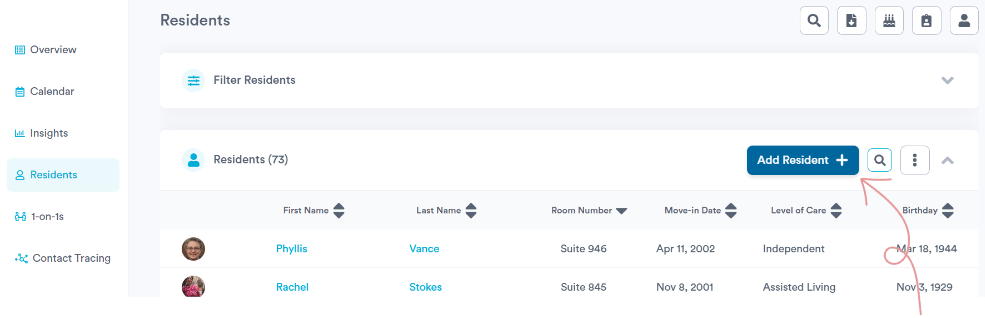
Note: If your Welbi site is integrated with your EHR system, such as PointClickCare or MED e-care, you will not have access to the "Add Resident" button in Welbi. New residents will automatically appear in Welbi once they are added to your EHR system.
After clicking the "Add Resident" button, a pop-up window will appear and you will be prompted to fill in the following information:
- First Name
- Last Name
- Level of Care
- Room Number
- Move-In Date (will default to today's date)
- Birthday
 From here, you can click the “Continue on Profile” button to continue completing the resident’s full profile right away, or click the "Add Resident" button to create the resident and move on with other tasks.
Note: If you choose not to complete a resident’s full profile right away, an incomplete Resident Profile will be reflected in the Outstanding Assessments & Profiles section of the Overview page.