When adding images to your Print Calendar, you can either choose to add them in such a way that they are free-floating (i.e., can be dragged-and-dropped to any location on the page), or so that they are contained within a calendar cell.
To add a free-floating image:
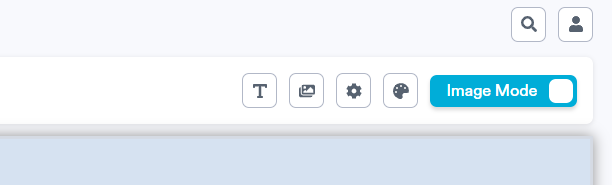
- Click on the "Images" button located towards the top right of the toolbar to open your Image Library.
- Once you have your Image Library open, you can select an existing image or add new images to your Image Library through one of the following methods:
- Click the 'Upload' button to upload an image from your computer

OR - Find the image you wish to add to your calendar (from the web, your computer, or wherever you like to source your calendar imagery) and 'copy' it by right-clicking on the image and selecting 'Copy Image'.

With your Image Library open, enter the keyboard shortcut for 'paste' (Ctrl + V on a PC, ⌘ + V on a Mac). This will upload the image to your Image Library and add it to your calendar in one step.
- Click the 'Upload' button to upload an image from your computer
- Once you have selected the image you wish to add to your calendar, you can single-click the image to drag it around the page and resize it by dragging the corners inwards or outwards.
If you want an image you appear on your calendar more than once, you can single-click the image to select it, then copy (Ctrl + C on a PC, ⌘ + C on a Mac) and paste (Ctrl + V on a PC, ⌘ + V on a Mac) it.

Note: If you're adding images to a Daily Calendar, these images will be on every page in your chosen date range.
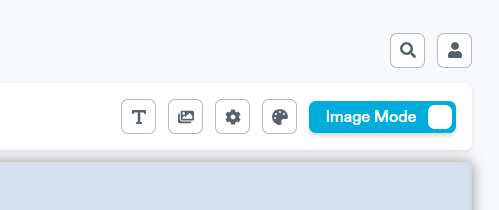
When you add a free-floating image using the steps above, you'll notice that you are automatically toggled into "Image Mode". When you are in "Image Mode", you are able to select and modify your free-floating images and text boxes but will not be able to select or modify the contents of your calendar cells.
To add an image within a cell:
- Toggle into "Cell Mode". This mode allows you to click into and modify your calendar cells.
- Click into the empty cell you would like to add an image to.
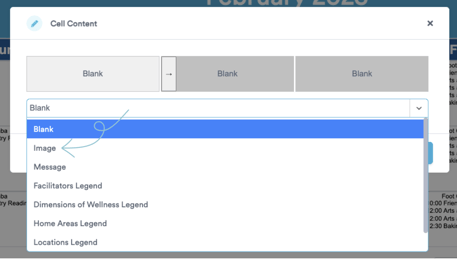
3. In the "Cell Content" pop-up that appears, select “Image” from the drop-down menu.Note: you cannot add images to a cell with a date (e.g., February 1st). Only free-floating images can be added to these cells.
4. Upload or select your desired image from the Image Library and choose how you'd like the image to fit within the cell:
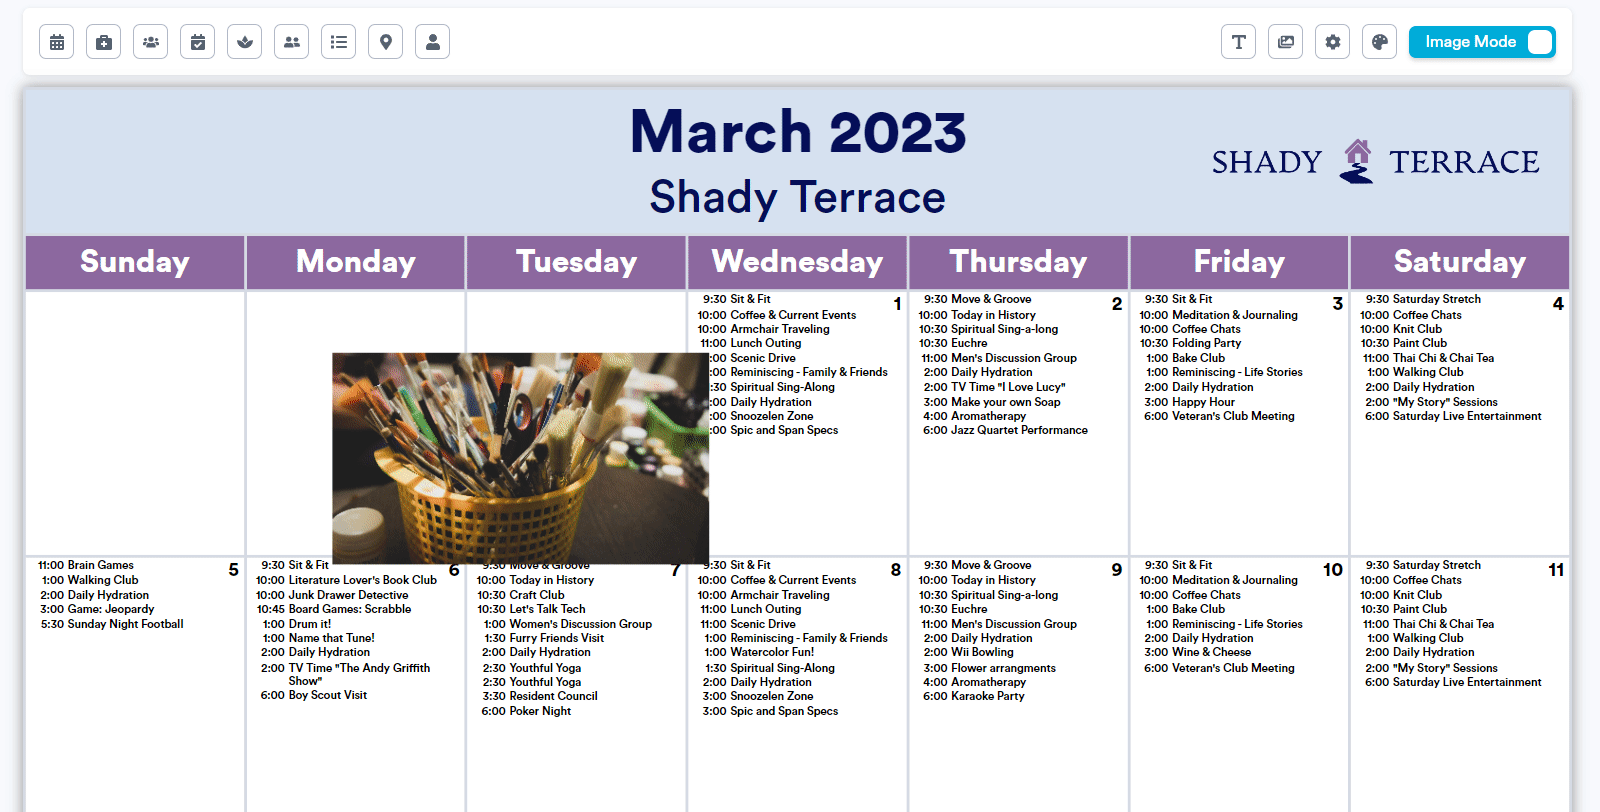
- "Fit" the image to the cell (this maintains the image's proportions and ensures the entire image is shown within the cell; this option may leave a white border around the image).
- "Fill" the entire cell with the image (this maintains the image's proportions and ensures the entire cell is filled; this option may result in some parts of the image being cut off).
- "Stretch" the image so that it fills the entire cell.
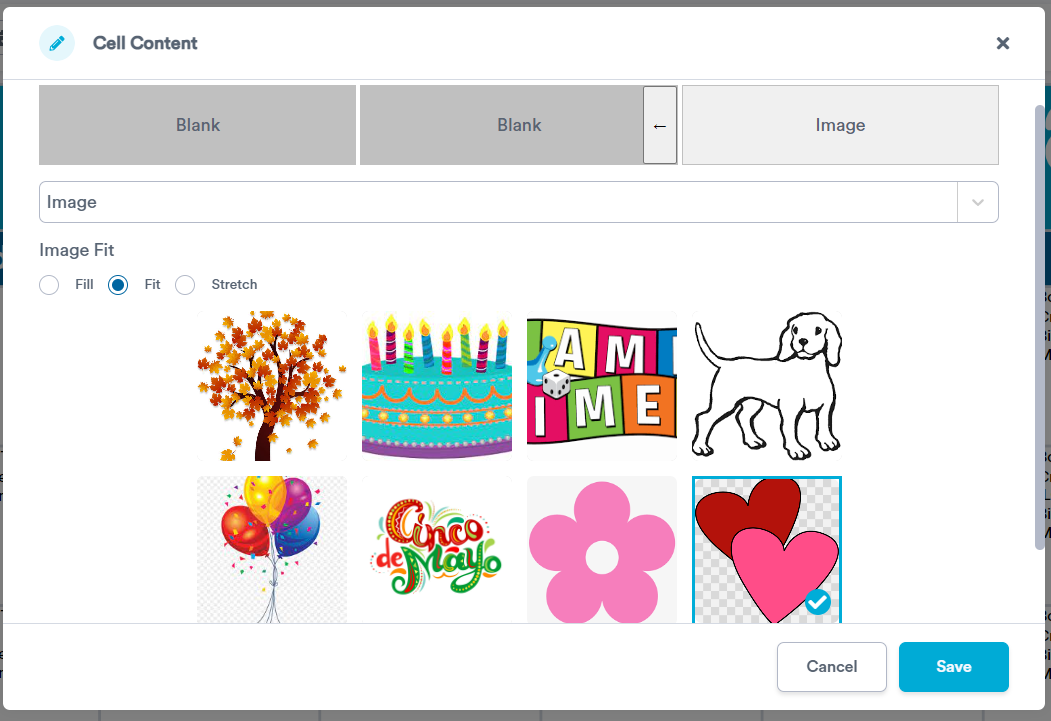
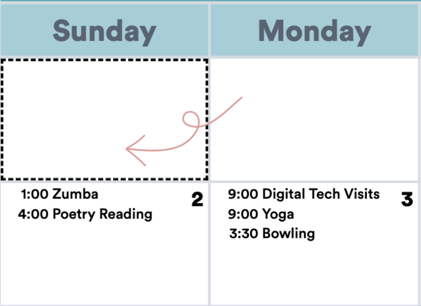
If you'd like your image to span across several cells, you can merge across cells using the arrow button as shown below: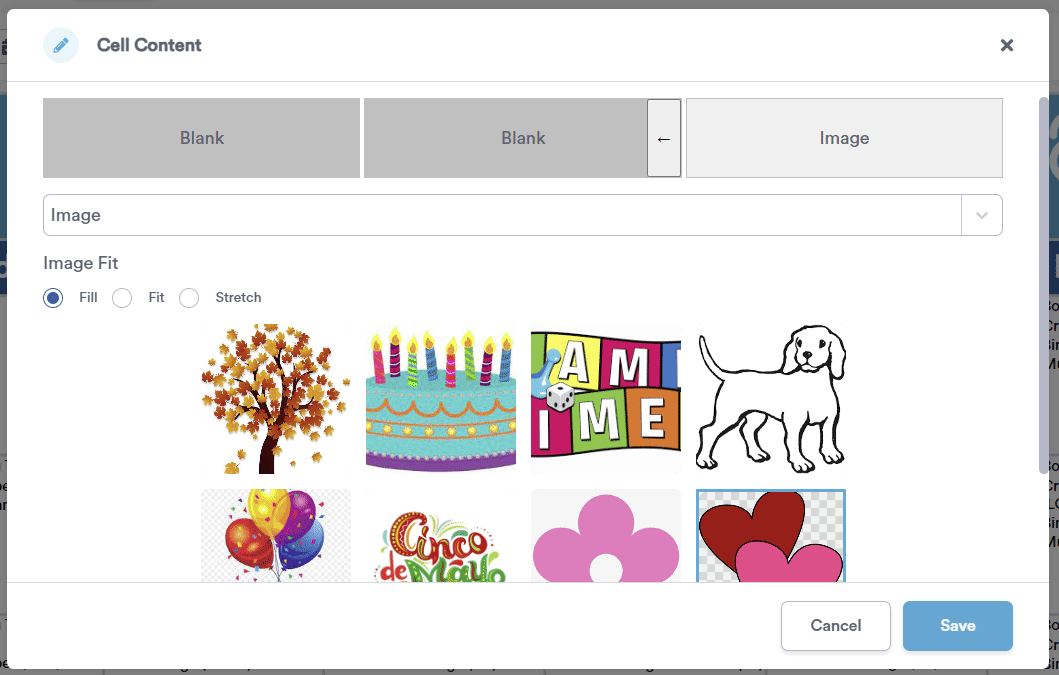
5. Click on the “Save” button in the bottom right corner of the Cell Content pop-up.
Your chosen image will now be placed within the cell. If you wish to edit the fit or placement of the image, or swap it out for another image, click back into the cell (while in "Cell Mode") and make your desired changes.
To remove an image from a cell, click into the cell you wish to edit (ensure you are still in "Cell Mode") and select "Blank" from the drop-down in the "Cell Content" pop-up.